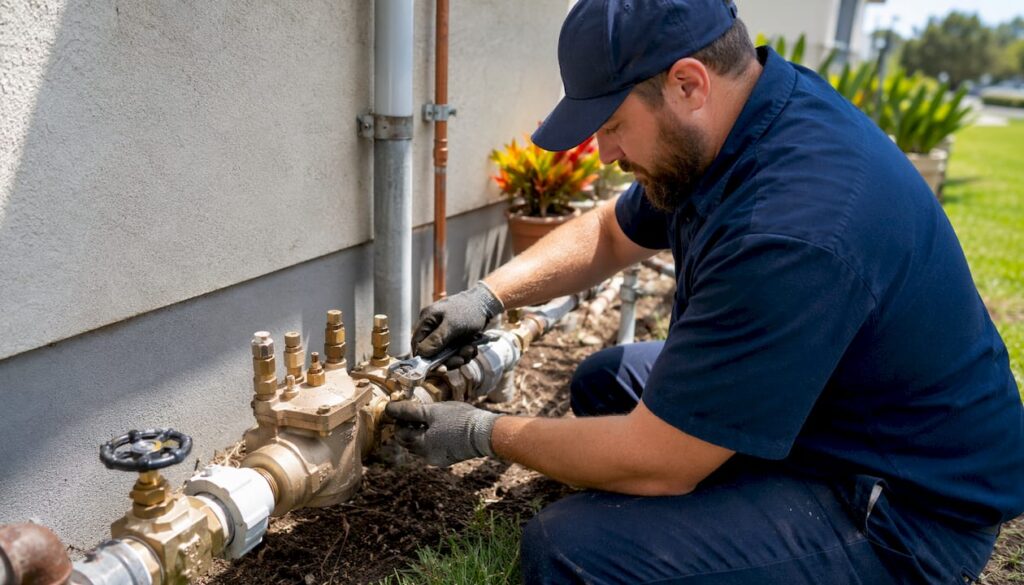
To install an RPZ valve correctly and stay code-compliant, notify your local water authority at least 10 working days before work starts, install the assembly per the Approved Installation Method (AIM), and have a certified tester commission it before you open the downstream isolation valve. That sequence is not optional. An RPZ is a high-hazard backflow preventer rated for fluid category 4 protection, which means it guards the public water supply against serious contamination. Skipping any step in the lifecycle exposes you to enforcement action, including temporary disconnection.
Here is what you need to do right now:
- Notify your water authority at least 10 working days before installation begins, using their official notification form.
- Confirm the installation location is above flood level, accessible for testing, and not near electrical equipment or concealed spaces.
- Hire a licensed plumber for the pipework and a separately accredited RPZ tester for commissioning.
- Do not open the downstream isolation valve until the accredited tester has completed and signed off the commissioning report.
- File the commissioning report with your local water authority within 10 working days of the test.
Pro Tip: At commissioning, photograph the valve’s serial number and attach a test record card to the assembly. Both steps prevent administrative delays when the water authority requests documentation.
Table of Contents
- What pre-install steps are required before RPZ valve setup?
- Parts and materials you need for a complete RPZ assembly
- How to install an RPZ valve: step-by-step workflow
- What does commissioning and compliance testing involve?
- What are your ongoing obligations after installation?
- Who should perform RPZ installations and commissioning?
- What does RPZ installation typically cost and how long does it take?
- Common installation mistakes and how to avoid them
- How Southjerseybackflow handles RPZ installations end to end
- Key Takeaways
- Why the compliance lifecycle matters more than the installation itself
- Southjerseybackflow covers RPZ installation and compliance across New Jersey
- Useful sources for RPZ installation and compliance
What pre-install steps are required before RPZ valve setup?
Getting the pre-work right is where most compliance problems start. A rushed notification or a poorly chosen location can get your consent withheld before a single pipe is cut.
Notification and consent
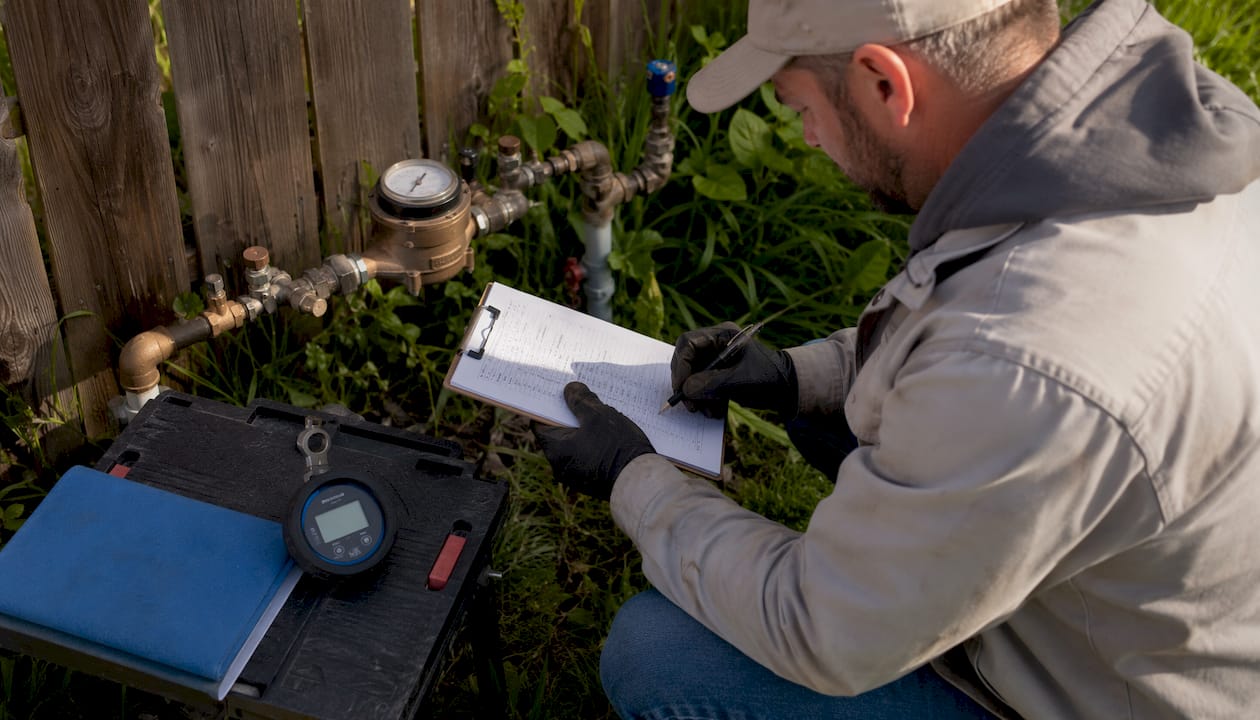
Property owners must notify their local water authority no fewer than 10 working days before starting any RPZ installation, relocation, or alteration. This applies in New Jersey just as it does under the AIM framework that governs RPZ installations across the water supply industry. Consent is conditional, and the authority can refuse it. Installing without consent can result in criminal prosecution.
The notification must include, at minimum:
- Property address and contact details
- Location and proposed mounting position of the RPZ
- Valve make, model, and serial number (if already purchased)
- Name and contact details of the planned installer and accredited tester
- Proposed start date
Site selection and AIM constraints
Consent will not be granted for locations that are flood-prone, below ground (unless the water authority agrees), concealed, exposed to freezing without protection, near electrical equipment, or anywhere that restricts access for testing and maintenance. These are hard exclusions, not suggestions.
Clearance requirements are specific: the minimum clearance from the underside of the relief valve exit port to the floor or cabinet base is 300 mm or twice the inlet diameter, whichever is greater. The top of the valve must not be higher than 1.5 m above floor level unless the water authority has agreed otherwise.
Additional site checklist items:
- Plan the tundish discharge route to a gully or drain before mounting
- Confirm frost protection or an enclosure if the location is outdoors or in an unheated space
- Identify upstream strainer placement and both isolation valve positions
- Gather the manufacturer’s installation manual and AIM reference before work starts
Pro Tip: Take dated photos of the proposed installation location and include them with your notification submission. Water authorities process consents faster when they can visually confirm the site meets AIM requirements.
Parts and materials you need for a complete RPZ assembly
Arriving on-site without the right components is one of the most common reasons installations stall. The AIM specifies what must be present, and a missing strainer or wrong-size tundish will fail commissioning.
Core RPZ assembly components
- RPZ valve body with a unique serial number permanently marked on the body
- Inlet and outlet servicing isolation valves (resilient-seat or seal type), installed immediately upstream and downstream of the RPZ
- Tundish (drip tray) positioned to receive relief port discharge with an air gap to drain
- Test cocks for pressure differential testing during commissioning and annual checks
- Unions or flanges appropriate to the pipe size and material
Supporting hardware and materials
Servicing valves must be installed immediately upstream and downstream of the RPZ valve assembly. Unless the valve already incorporates one, an inline strainer belongs immediately upstream of the inlet isolation valve to protect internal components from debris. For outdoor or unheated installations, add a frost-proof enclosure rated for the local climate.
For the tundish drain, route to a gully where possible. If no gully is available, connect to a waste pipe using a waterless trap rather than a standard S-bend, which will dry out and allow sewer gases back through. Where no waste pipe is practical, a waste vessel with a warning device is acceptable.
Additional materials:
- Mounting bracket or support for larger assemblies
- Thread sealant and appropriate gaskets
- Pipe wrenches and torque tools
- Pressure gauges for pre-commissioning flush
- Labeling materials and a test record card
Documentation to keep on-site
- Valve serial number (photographed and recorded)
- Manufacturer’s installation and maintenance manual
- AIM reference document
- Installer and accredited tester contact details
- Notification receipt from the water authority
How to install an RPZ valve: step-by-step workflow
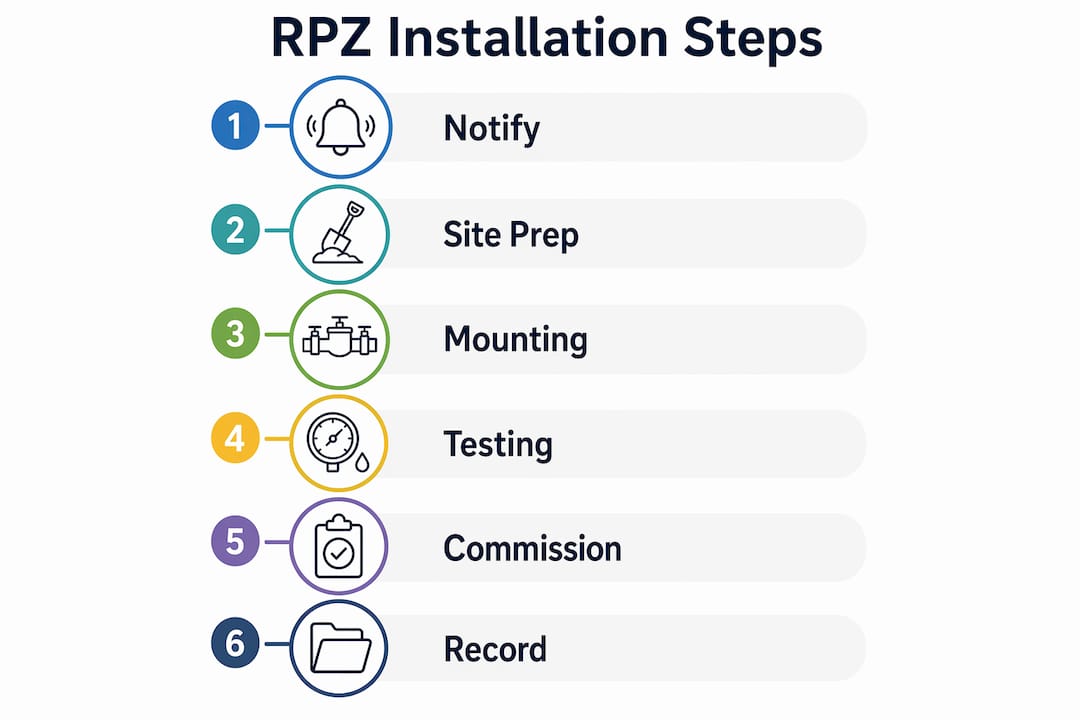
Install the RPZ horizontally with the relief port discharging downward, upstream strainer and servicing valves in place, and leave the downstream isolation valve closed until an accredited tester commissions the assembly.
Sequential installation steps
- Verify notification and consent. Confirm the water authority has received your notification and consent is granted before touching any pipework.
- Isolate the supply. Shut off the main water supply to the section where the RPZ will be installed.
- Cut and prepare the pipe. Measure and cut the supply line at the planned installation point. Deburr and clean pipe ends.
- Install the upstream strainer and inlet isolation valve. Mount the strainer first, then the inlet servicing valve immediately downstream of it.
- Mount the RPZ valve body. Position horizontally, relief port facing downward, at a height between 300 mm and 1.5 m from floor level. Secure with a bracket if the assembly is large.
- Install the outlet isolation valve. Mount immediately downstream of the RPZ body. Leave it closed.
- Connect the tundish and drain. Attach the tundish below the relief port with a clear air gap. Route the drain line to a gully, waste pipe with a waterless trap, or approved waste vessel.
- Tighten all unions and compression fittings. Check torque against the manufacturer’s specification.
- Flush the system. Open the inlet isolation valve and flush thoroughly to clear debris before commissioning. Sterilize pipework if required under local regulations.
- Label the device. Attach the test record card and photograph the serial number.
- Leave the downstream isolation valve closed. The RPZ must not be put into service until commissioning is complete.
Orientation and clearance specifics
RPZ valves must be installed horizontally with the relief valve discharging downward unless the valve is specifically approved for vertical or inclined installation. Minimum clearances: 300 mm from the floor to the underside of the relief exit port or twice the inlet diameter, whichever is greater; maximum 1.5 m to the top of the valve unless your water authority agrees to a different height; 50 mm between the RPZ body and any rear wall or cabinet; and 150 mm above the valve for test equipment access.
Pro Tip: Install test cocks in positions that allow a tester to connect pressure gauges without removing any fittings. A 150 mm clear working space above the valve is the minimum; more is always better.
Avoid installing near electrical equipment, in flood-prone areas, or below ground. The relief valve discharges water under certain fault conditions, and any discharge must be visible and routed safely away from equipment and people.
What does commissioning and compliance testing involve?
An RPZ is not legally in service until an accredited tester commissions it and files the test report with the water authority. Opening the downstream valve before that step is a compliance violation, full stop.
What the accredited tester checks
The tester uses calibrated pressure test equipment to verify that every component of the assembly is functioning as intended. Key checks include:
- Differential pressure between zones 1 and 2 (the relief valve must begin to open at a differential of not less than 0.14 bar)
- Tightness of both isolation valves
- Relief valve operation: watertight at both the start and end of the test, opening correctly under the specified differential
- Check valve integrity and leak rates
- Correct orientation, clearances, and drainage routing
- Strainer condition (debris removed if present)
- Conformity with AIM clauses
| Test item | Acceptable outcome | Fail trigger |
|---|---|---|
| Zone 1–2 differential pressure | Relief valve opens at ≥ 0.14 bar differential | Opens below 0.14 bar or fails to open |
| Relief valve watertightness | No leakage at start and end of test | Any leakage at commencement or conclusion |
| Isolation valve tightness | Valves hold under test pressure | Leakage past seats |
| Check valve function | Both check valves hold differential | Either check valve fails to hold |
| Drain and tundish routing | Clear air gap, discharge visible, no obstruction | Blocked drain, no air gap, or concealed discharge |
| AIM conformity | All clearances, orientation, and labeling correct | Any non-conformity with AIM clauses |
Test equipment and evolving standards
The AIM notes that all RPZ test equipment is anticipated to meet minimum specification requirements no later than July 1, 2026. Until January 1, 2026, transitional procedures applied for testers using u-tube manometers. If your commissioning appointment falls in 2026, confirm with your tester that their equipment meets the current minimum specification.
Timing and paperwork
A commissioning test report must reach the local water authority within 10 working days of installation. For ongoing compliance, periodic testing must occur at least annually, and the compliance test report must be filed within 10 working days of the set test interval. Annual compliance tests may be carried out no earlier than 30 days before the test due date.
What happens on failure
If the RPZ fails commissioning, isolate the assembly immediately by closing both servicing valves. Do not put the device into service. The tester will identify the specific failure mode, whether a debris-trapped check valve, a worn relief valve spring, or a clearance issue, and the installer or service provider must repair and re-test before the report can be filed. Failure to comply with consent conditions, including testing and report filing, can result in enforcement action and temporary disconnection of the water supply.
What are your ongoing obligations after installation?
The physical installation is a one-time event. The compliance lifecycle runs for the life of the valve, and property managers who treat it as a set-and-forget item are the ones who end up with enforcement notices.
Annual testing and intervals
All RPZ valves require periodic compliance testing as a condition of consent. The default interval is annual, but your local water authority can set shorter intervals. The test due date cannot be changed without the authority’s agreement, and testing must be completed no later than that date. A re-test is also required after any repair, relocation, or dismantling of the assembly.
Record-keeping requirements
Retain commissioning test reports for the lifetime of the valve. Keep all compliance test reports for a recommended extended period suitable to maintenance needs. Send copies to the water authority within 10 working days of each test. A test record card attached to the assembly makes it easy for any tester or inspector to confirm the device’s history at a glance.
Maintenance checklist
- Keep the area around the valve clear for unobstructed tester access
- Inspect the upstream strainer periodically and clean out debris
- Check for signs of freezing risk before winter, especially for outdoor or unheated installations
- Inspect seals and springs during any service visit and replace worn components
- Confirm the tundish drain is clear and the discharge path is unobstructed
When something goes wrong
If you see water discharging continuously from the relief port, or if the valve shows visible leaks, isolate the assembly by closing both servicing valves. Contact a competent service provider for repair or rebuild. Do not attempt to bypass the valve or leave it discharging. Schedule a re-test immediately after repair, and file the new test report with the water authority within 10 working days.
Who should perform RPZ installations and commissioning?
Commissioning and compliance testing must be performed by a competent, accredited RPZ tester. Water authorities will not accept test reports from non-accredited individuals, and a report submitted without proper credentials will be treated as non-compliant.
Installer vs. tester: two distinct roles
A licensed plumber handles the physical pipework: cutting the supply line, mounting the valve, connecting the tundish and drain, and installing the isolation valves and strainer. That is the installation role. The accredited RPZ tester is a separate function: they apply calibrated test equipment to the assembled device, verify all performance parameters, sign the commissioning report, and submit it to the water authority.
In some cases, one person holds both qualifications. More often, they are separate contractors. Either way, both roles must be filled before the device goes into service.
Why DIY is strongly discouraged
Installation errors that prevent commissioning are the installer’s problem, not the tester’s. A valve mounted at the wrong height, a missing strainer, or a tundish connected without an air gap will fail the commissioning inspection and require rework before the tester can proceed. Beyond the rework cost, a non-accredited commissioning attempt will not be accepted by the water authority, leaving the property in a non-compliant state. Understanding what plumbing compliance means when hiring a contractor is the first step toward avoiding that situation.
Practical hiring tips
- Ask for the tester’s accreditation credentials before booking
- Confirm the installer has worked with the specific AIM version in effect for your water authority
- Request a sample test report form to verify it matches the format your water authority accepts
- For property managers with multiple devices, ask whether the provider can handle consolidated billing and direct report filing
What does RPZ installation typically cost and how long does it take?
The end-to-end timeline from notification to commissioned device typically runs 2–6 weeks, depending on how quickly the water authority processes consent and how soon an accredited tester is available. Budget for at least 10 working days of notification lead time before any work begins.
Typical cost components
Costs vary by property type, pipe size, and site conditions, but the main line items are:
- Valve assembly: The RPZ body, isolation valves, strainer, tundish, and fittings
- Installation labor: Plumber’s time for pipework, mounting, and drain connection
- Enclosure or drain work: Additional cost if the location requires a frost-proof cabinet or a long drain run
- Commissioning and testing fee: Accredited tester’s time, calibrated equipment, and report filing
For a straightforward residential or light-commercial installation, expect the combined valve-and-labor cost to run in the hundreds of dollars, with commissioning adding a separate fee on top. Larger commercial assemblies, outdoor enclosures, or complex drain routing push costs higher. Emergency or out-of-hours work carries a labor premium.
Pro Tip: Bundle the commissioning appointment and the first annual compliance test with the same provider when you book the installation. You will often secure a better combined rate, and the provider will already have the test due date on file, reducing the chance of a missed deadline.
Common installation mistakes and how to avoid them
Most commissioning failures trace back to a handful of predictable errors. Knowing them in advance is cheaper than fixing them after the tester arrives.
Frequent errors
- Installing in a flood-prone or below-ground location without water authority agreement. This is an automatic consent refusal.
- Incorrect relief port orientation. The relief valve must discharge downward. A valve installed with the relief port facing sideways or upward will fail the AIM conformity check.
- No tundish or improper drain connection. The discharge must be visible and routed with a proper air gap. A standard S-bend trap will dry out; use a waterless trap or route directly to a gully.
- Missing upstream strainer. Debris in the supply line is the most common cause of check valve failure at commissioning. The strainer is not optional.
- Inaccessible test cocks. If the tester cannot connect pressure gauges without removing fittings or working in a confined space, the commissioning appointment will be delayed or aborted.
- Insufficient clearances. Less than 300 mm below the relief exit port, or the top of the valve above 1.5 m, will require rework before the tester can proceed.
Troubleshooting tips
If the relief valve is discharging continuously after installation, the most likely causes are debris in the check valves (clean the upstream strainer and flush again) or a worn relief valve spring (requires a spares kit). If test cocks are obstructed, check whether the mounting bracket or adjacent pipework is blocking access and reposition before the commissioning appointment.
Commissioning-day checklist
- Both isolation valves installed and the downstream valve confirmed closed
- Upstream strainer clean and free of debris
- Tundish drain clear and discharge path unobstructed
- Device label in place and serial number photographed
- Test record card attached to or adjacent to the assembly
- Manufacturer’s manual and AIM reference available on-site
Owners can clear a blocked tundish drain themselves. Replacing a relief valve assembly or rebuilding check valves requires a competent service provider and a subsequent re-test.
How Southjerseybackflow handles RPZ installations end to end
Southjerseybackflow manages the full RPZ compliance lifecycle for residential, commercial, and multi-unit properties across New Jersey: from pre-install notification assistance through AIM-compliant installation, accredited commissioning, annual testing, and direct filing of test reports with the water authority.
A typical Southjerseybackflow engagement runs like this: a site assessment confirms the proposed location meets AIM clearance and drainage requirements, the team assists with the notification submission to the local water authority, and a written quote covers installation labor, valve assembly, enclosure work if needed, and the commissioning appointment. After installation, a certified tester commissions the device and submits the report directly to the water authority, with a copy retained for the property owner’s records.
What customers can expect
- Site survey and written quote before any work begins
- Installation work order with documented valve serial number and location
- AIM-compliant mounting, tundish connection, and isolation valve placement
- Commissioning by a certified tester with calibrated equipment
- Direct submission of the commissioning and compliance report to the water authority
- Scheduled annual testing reminders so test due dates are never missed
Southjerseybackflow will not bypass required testing or file incomplete reports. For property managers handling multiple devices across several addresses, the company offers consolidated billing and tracks test due dates across the portfolio. Work orders from Westfield, Cherry Hill, and Atlantic City illustrate the repeatable documentation process the company uses across New Jersey municipalities.
| Service | What Southjerseybackflow delivers |
|---|---|
| Pre-install notification | Assists with water authority notification submission |
| AIM-compliant installation | Licensed plumber, correct orientation, clearances, and drain routing |
| Commissioning | Certified tester, calibrated equipment, signed report |
| Report filing | Direct submission to water authority within required timescales |
| Annual testing | Scheduled compliance tests with test due date tracking |
| Repair and rebuild | Emergency and scheduled repair with immediate re-test |
Key Takeaways
A compliant RPZ installation requires notification before work starts, AIM-compliant mounting by a licensed plumber, accredited commissioning before the valve goes into service, and annual compliance testing with filed reports retained for at least five years.
| Point | Details |
|---|---|
| Notify first | Submit notification to your water authority at least 10 working days before installation begins. |
| Follow AIM requirements | Install horizontally, relief port down, with isolation valves, upstream strainer, minimum 300 mm (or twice the inlet diameter) to the underside of the relief port, and top of valve no higher than 1.5 m unless agreed. |
| Commission before use | An accredited tester must commission the RPZ and file the report within 10 working days before the downstream valve opens. |
| Test annually | Compliance testing must occur at least annually; re-test after any repair, relocation, or dismantling. |
| Use Southjerseybackflow | Southjerseybackflow handles installation, commissioning, annual testing, and direct report filing across New Jersey. |
Why the compliance lifecycle matters more than the installation itself
The physical installation of an RPZ valve is, honestly, the straightforward part. A competent plumber can mount the assembly, connect the tundish, and install the isolation valves in a few hours. What trips up homeowners and property managers is everything that surrounds that work: the notification that has to go out 10 working days in advance, the accredited tester who has to be booked before the downstream valve opens, the commissioning report that has to reach the water authority within 10 working days, and the annual test due date that cannot slip without the authority’s agreement.
The biggest compliance risk is not a poorly mounted valve. It is a correctly installed valve that never gets commissioned, or gets commissioned but the report never gets filed, or gets filed once and then the annual test gets forgotten. Water authorities treat those failures the same way they treat a bad installation: enforcement action, potential disconnection, and a requirement to remove the device.
The most reliable way to avoid that outcome is to contract a single provider to handle the full lifecycle, install through annual testing, with direct report filing included. That removes the hand-off errors between installer, tester, and property owner that cause most of the compliance gaps seen in practice. If you are managing multiple properties, the case for a single accountable provider is even stronger.
Southjerseybackflow covers RPZ installation and compliance across New Jersey
If you have received a notice from your water authority or are planning a new RPZ installation, Southjerseybackflow offers a done-for-you path from site survey to filed commissioning report. The company handles backflow testing and compliance across New Jersey, covering residential, commercial, and multi-unit properties in counties including Ocean, Mercer, Salem, Hunterdon, Middlesex, Gloucester, and Cumberland.

Services include RPZ installation, enclosure work, accredited commissioning, annual compliance testing, repair and rebuild, and direct filing of test reports with your local water authority. Southjerseybackflow tracks test due dates for property managers with multiple devices, so nothing falls through the cracks between billing cycles. The team also assists with the initial notification submission, which is the step most property owners miss until it is too late.
To schedule a site survey or request a quote, visit southjerseybackflow.com or go directly to the backflow compliance guide for NJ to understand exactly what your water authority requires before you book.
Useful sources for RPZ installation and compliance
These are the primary references used throughout this guide. Save them before your installation begins.
- Water Undertakers RPZ AIM: The Approved Installation Method document that governs RPZ installation, commissioning, and testing across the UK water supply industry. Use this for notification requirements, consent conditions, clearance specifications, and test report timescales. The AIM is the single most authoritative document for any RPZ installation.
- Water Regs UK — RPZ guidance: The Water Regs UK topic page for RPZ valves, covering compliance testing intervals, enforcement consequences, and links to notification forms for individual water authorities. Bookmark this for annual testing obligations and enforcement risk information.
- Arrow Valves RPZ Operating and Maintenance Manual: Model-specific installation instructions covering horizontal mounting, tundish connection, clearance dimensions, flushing procedure, and commissioning sequence. Use this alongside the AIM for model-specific orientation and parts guidance.
- Bristol Water — Reduced Pressure Zone Valves: A water authority’s own explanation of RPZ valve requirements, useful for understanding how water undertakers classify RPZ devices as high-hazard assemblies and what they expect from installers and testers.
- Southjerseybackflow — What Is a Reduced Pressure Zone Valve?: NJ-specific guide to RPZ fundamentals, testing obligations, and the compliance lifecycle for New Jersey property owners.
Retain your commissioning test report for the lifetime of the valve and all compliance test reports for at least five years, as required by the AIM. Store digital copies alongside the manufacturer’s manual and your water authority notification receipt.