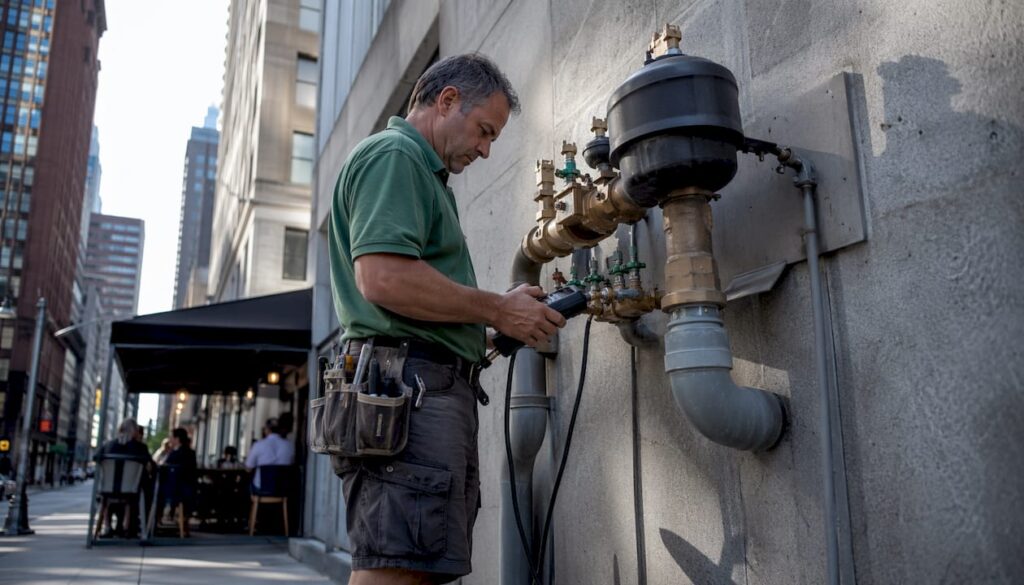
A certified tester uses a calibrated differential pressure gauge kit to verify three internal elements of a Reduced Pressure Zone (RPZ) assembly: Check Valve #1 must hold at least 5 PSID, the relief valve must open at 2 PSID or higher, and Check Valve #2 must hold at least 1 PSID. Fail any one of those thresholds and the assembly fails the test, full stop. Most U.S. jurisdictions require annual RPZ backflow testing by a certified tester, with results filed directly with the local water authority. Miss the deadline and you risk fines or, in some municipalities, water service interruption.
Key compliance points at a glance:
- Check #1 threshold: ≥5 PSID (tightness test)
- Relief valve threshold: opens at ≥2 PSID (and must open below the #1 differential)
- Check #2 threshold: ≥1 PSID (tightness test)
- Filing requirement: certified test report submitted to the local water purveyor after every test
- Frequency: annual testing is the standard in most U.S. jurisdictions; some high-hazard sites require more frequent checks
- Enforcement: per the EPA Cross-Connection Control Manual, utilities can disconnect water service when testing compliance is not demonstrated
Primary field references include the NEWWA laminated RPZ test procedure, the EPA Cross-Connection Control Manual, and IAPMO BPI guidance on tester responsibilities. For New Jersey properties, Southjerseybackflow handles certified testing, repair, and direct filing with local water authorities.
Pro Tip: Before you touch a single test cock, confirm the gauge calibration date on your kit. An expired calibration sticker can invalidate the entire test result when the municipality audits the file.
Table of Contents
- How to perform RPZ backflow testing: the full field procedure
- What tools and equipment you need for a valid RPZ test
- Pass/fail thresholds and what failures actually mean
- Pre-test inspection and on-site safety checks
- Recording results, filing reports, and meeting regulatory deadlines
- What to do when an RPZ fails the test
- Who is qualified to test an RPZ, and what does it cost?
- Key Takeaways
- Why the test result is only half the job
- Certified RPZ testing and filing for New Jersey properties
- Useful sources and reference procedures
How to perform RPZ backflow testing: the full field procedure
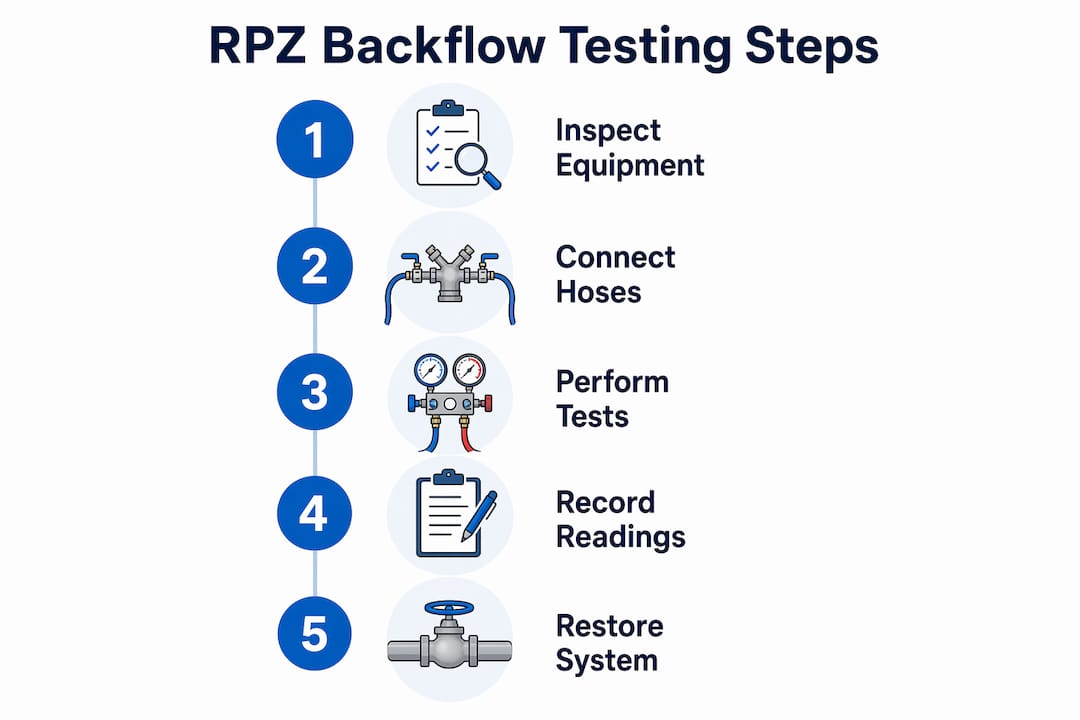
The sequence below follows the NEWWA laminated RPZ procedure and the Backflow Parts Depot RP testing guide, which align with standard 5-valve test kit hookups used across U.S. jurisdictions.
Preparation
- Notify the property owner or occupants that water service will be briefly interrupted and that the relief valve may discharge water during the test.
- Close the downstream shutoff valve (SV2) first, then close the upstream shutoff valve (SV1). This isolates the assembly without creating a pressure surge.
- Verify the relief valve discharge path is clear and draining to an acceptable location. Place a bucket or drain pan beneath the relief valve port.
- Identify and label the test cocks: TC#1 is upstream of Check #1, TC#2 is between Check #1 and the relief valve zone, TC#3 is downstream of Check #2, and TC#4 is the bypass/vent port (on 5-valve kits).
Gauge hookup and air bleed
- Flush each test cock briefly to clear debris before attaching hoses.
- Connect the calibrated test kit: high-side (red) hose to TC#2, low-side (blue) hose to TC#3, and bypass/vent (green) hose to TC#4.
- Open test cocks and bleed air from the hoses until both gauge needles stabilize. Trapped air produces false readings.
Test A: Check Valve #1 differential
- Close the #2 needle valve on the test kit to isolate the low side.
- Slowly open SV2 to pressurize the downstream side.
- Record the differential reading. A reading of ≥5 PSID is a pass. Below 5 PSID, Check #1 is leaking and the assembly fails.
Test B: Relief valve opening
- With SV2 still closed and the system pressurized, slowly open the bypass needle valve to bleed pressure from the zone between the two checks.
- Watch for the relief valve to open (audible discharge or visible water from the relief port). Note the differential at which it opens.
- Acceptance: the relief valve must open at ≥2 PSID and must open before the differential drops to zero. If it opens below 2 PSID or fails to open at all, the assembly fails.
Test C: Check Valve #2 differential
- Close the bypass valve and allow pressure to restabilize.
- Open the low-side needle valve to read the downstream differential.
- Record the reading. A reading of ≥1 PSID is a pass.
System restoration
- Close all test cocks, remove hoses, and reinstall test cock plugs.
- Slowly open SV1 first, then SV2, to restore service without water hammer.
- Verify both shutoff valves seat fully (no bypass flow) and confirm the relief valve is closed and dry.
- Complete the test form on-site with all differential readings, gauge calibration ID, tester certification number, and pass/fail outcome. Obtain owner signature where required.
| Test | High-side connection | Low-side connection | Acceptance threshold |
|---|---|---|---|
| Check #1 differential | TC#2 | TC#3 | ≥5 PSID |
| Relief valve opening | TC#2 (bypass bleed) | Relief port observation | Opens at ≥2 PSID |
| Check #2 differential | TC#3 | Downstream | ≥1 PSID |
Pro Tip: Label your hoses before every job. Red to high, blue to low, green to vent. A reversed hookup on a 5-valve kit produces a mirror-image reading that looks like a pass when the assembly is actually failing.
What tools and equipment you need for a valid RPZ test
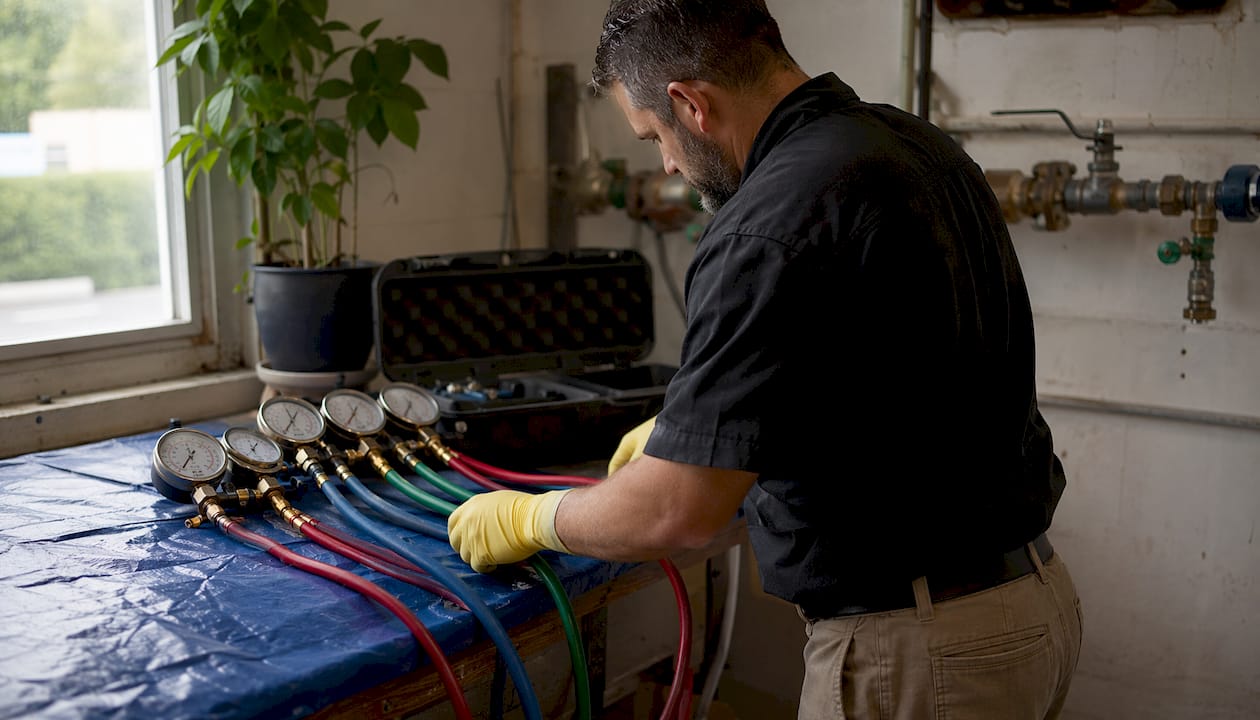
Showing up without the right gear, or with an uncalibrated kit, means the test cannot be filed. Here is what belongs in every tester’s bag.
Core test equipment:
- Calibrated differential pressure gauge or 5-valve test kit with annual calibration traceable to a recognized standard. Accuracy of ±0.5% full scale is the target; check your local code for the minimum acceptable tolerance.
- Color-coded hoses: red (high), blue (low), green (vent/bypass). Keep a spare set; cracked hose fittings cause air leaks that destabilize readings.
- Fittings and adapters for common test cock sizes (¼-inch and ⅜-inch are most common in the U.S.; some older assemblies use proprietary sizes).
- Shutoff tools: flat-blade and Phillips screwdrivers, adjustable wrench, and a test cock key for quarter-turn cocks.
- Drain bucket or absorbent pads for relief valve discharge. A water damage prevention mindset matters here — relief discharge can soak flooring or damage equipment in mechanical rooms.
Gauge calibration requirements:
Field guides consistently recommend annual gauge calibration at minimum, and more frequently when the kit is dropped or shows erratic readings. Calibration must be traceable, and the certificate should travel with the kit. When a municipality audits test files, an up-to-date calibration sticker is often the first thing they check. For a deeper look at kit options, the best backflow test kits guide covers current field-rated models.
Safety and PPE:
- Safety glasses or a face shield for relief valve discharge (pressurized water can spray unexpectedly)
- Nitrile gloves when handling older assemblies with lead-containing solder or corroded fittings
- Non-slip footwear if the test site has wet floors or outdoor grade changes
- Traffic cones or signage for public or commercial areas where pedestrian traffic is present
Pre-job inventory checklist:
- [ ] Test kit with current calibration certificate
- [ ] Red, blue, and green hoses (inspect for cracks)
- [ ] Adapter set for test cock sizes on-site
- [ ] Drain bucket and absorbent pads
- [ ] Test forms (paper or digital)
- [ ] PPE (glasses, gloves, footwear)
- [ ] Shutoff tools and test cock key
Pro Tip: Photograph your gauge calibration certificate alongside the assembly nameplate at the start of each job. That single photo answers 90% of the questions that come up during a utility audit.
Pass/fail thresholds and what failures actually mean
The numbers below come directly from the NEWWA RPZ procedure and the Backflow Parts Depot RP testing guide. Every threshold is a hard line, not a guideline.
| Component | Minimum threshold | Failure indication | Common cause |
|---|---|---|---|
| Check Valve #1 | ≥5 PSID | Differential drops below 5 PSID | Debris on seat, worn elastomer, corroded spring |
| Relief valve | Opens at ≥2 PSID | Opens below 2 PSID or fails to open | Fouled seat, weak spring, debris lodged in valve body |
| Check Valve #2 | ≥1 PSID | Differential drops below 1 PSID | Worn disc, debris, damaged O-ring |
A marginal reading — say, Check #1 at 5.1 PSID — technically passes, but it warrants a note on the test form and a conversation with the property owner. Debris, corrosion, and pressure fluctuations are the most common root causes of RPZ failures; a device hovering at the threshold today is often a failure within months.
Common failure patterns to watch for:
- Relief valve weeping or dripping during normal operation: usually signals Check #1 is leaking internally, allowing downstream pressure to push back against the relief zone.
- Stuck test cocks: force is tempting but wrong. A seized test cock that won’t open cleanly can produce a false low reading. Document it and flag it for repair.
- Rapid pressure drop on Check #1: points to a heavily fouled or cracked seat. A rebuild kit may resolve it; if the body shows corrosion, replacement is the safer call.
- Relief valve that won’t open during Test B: the spring may be seized or the valve body corroded shut. This is a fail, and the assembly must be repaired before the system is returned to service.
- Marginal Check #2 readings: often caused by a worn disc or a damaged O-ring. These are inexpensive to replace during a rebuild.
For a deeper look at diagnosing these patterns, the common backflow issues guide covers field-level troubleshooting in detail.
Pro Tip: When a reading is marginal but passing, write the exact differential on the form and add a maintenance note. That record protects you if the device fails between tests and someone asks why it wasn’t flagged.
Pre-test inspection and on-site safety checks
A test performed on an unsafe or improperly isolated assembly is both a liability and a compliance risk. Run through these checks before connecting a single hose.
Site readiness checklist:
- Upstream and downstream shutoff valves: operate both manually to confirm they seat fully. A shutoff valve that bypasses even slightly will skew differential readings and may prevent the relief valve from opening correctly during Test B.
- Test cock accessibility: all four test cocks must be reachable without moving the assembly. If the assembly is boxed in by pipe insulation or enclosure panels, clear access before starting.
- Relief valve discharge path: confirm the discharge drains to a floor drain, exterior grade, or approved receptor. An obstructed discharge path can cause the relief valve to back-pressure during testing, producing a false fail.
- Assembly mounting: check that the assembly is rigidly supported. Movement during pressurization can shift hose connections and introduce air.
- Visible damage: look for corrosion, cracks in the body, or signs of prior unauthorized repair (mismatched fittings, thread tape over cracks). Document anything unusual before starting.
Safety steps during the test:
- Warn anyone in the immediate area before opening the relief valve bleed sequence. Discharge can be forceful.
- On outdoor or public-access sites, set up traffic cones or temporary barriers around the assembly before starting.
- For large-diameter assemblies (2½ inches and above), two-person assistance is strongly recommended when connecting heavy hoses and operating stiff shutoff valves.
- If the test site involves a service interruption that affects multiple tenants or a commercial operation, coordinate the timing with the property manager and provide written notice of the expected outage window.
Pro Tip: Absorbent pads under the assembly before you start saves cleanup time and prevents slip hazards. Relief valve discharge during Test B can release more water than expected, especially on assemblies that haven’t been tested in over a year.
Recording results, filing reports, and meeting regulatory deadlines
The test form is not a formality. It is the legal record that proves compliance, and utilities treat it that way.
Required fields on every RPZ test report:
- Property owner name and service address
- Assembly make, model, size, and serial number
- Test cock readings: Check #1 differential, relief valve opening differential, Check #2 differential
- Pass/fail outcome for each component and overall
- Gauge calibration certificate ID and calibration date
- Tester name, certification number, and issuing authority
- Date and time of test
- Owner or representative signature (where required by the local utility)
Regulatory filing workflow:
Most U.S. water purveyors require the certified tester to submit the completed form directly, either by mail, email, or an online portal. The property owner typically receives a copy. Some utilities issue a compliance confirmation number; keep that on file. Per the EPA Cross-Connection Control Manual, utilities have authority to disconnect service when testing records are not received, and they exercise that authority.
Testing frequency and common variations:
| Trigger | Typical requirement |
|---|---|
| Routine compliance | Annual test, certified tester |
| New installation | Test immediately after installation |
| After repair or rebuild | Re-test before returning to service |
| After depressurization or winterizing | Re-test before restoring service |
| High-hazard site | Some jurisdictions require more frequent testing |
Certification requirements for testers vary by state. New York State, for example, requires initial training and periodic renewal, with certification renewal cycles that span multiple years depending on the jurisdiction. Oregon requires completion of an approved five-day backflow tester course plus a Construction Contractors Board license for fee-based work. New Jersey has its own requirements; the NJ compliance overview covers what testers and property owners need to know locally.
What to do when an RPZ fails the test
A failed test is not the end of the process. It is the beginning of a documented repair sequence.
Immediate steps after a failure:
- Mark the assembly as failed on the test form. Do not leave the site without documenting the specific threshold that was not met and the reading recorded.
- Notify the property owner or manager immediately. Explain which component failed and what the practical risk is (e.g., a failed Check #1 means the relief valve is the only barrier between the potable supply and a potential contamination path).
- Determine whether the water authority requires immediate isolation. Some utilities mandate that a failed assembly be taken out of service until repaired; others allow a short repair window. Check the local utility’s rules before restoring service.
- Arrange repair, rebuild, or replacement before the next service restoration if required.
Repair vs. rebuild vs. replace:
- Rebuild kit: appropriate when the assembly body is in good condition, the failure is isolated to a worn disc, O-ring, or spring, and the make/model has readily available parts. Rebuild kits are cost-effective for assemblies under roughly 10 years old with no history of repeated failures.
- Full replacement: warranted when the body shows corrosion, cracks, or deformation; when the assembly has failed multiple consecutive tests; or when parts are no longer available for the model.
- Immediate utility notification: required when the failure represents a public-safety hazard (e.g., confirmed backflow event, open cross-connection). The EPA manual is clear that utilities must investigate and can discontinue service until a passing test is confirmed.
After repair: re-test and document:
- Perform the full three-test sequence again using the same calibrated kit.
- Record the parts used (make, model, kit number) on the re-test form.
- Submit the re-test report to the water authority per their filing rules.
- Retain copies of both the failed test report and the passing re-test report. That paper trail is the property owner’s protection if a contamination question arises later.
Pro Tip: When you rebuild an assembly, photograph the worn parts before discarding them. A photo of a cracked disc or corroded spring is compelling documentation if the property owner questions why a rebuild was necessary.
Who is qualified to test an RPZ, and what does it cost?
Not everyone with a wrench can file a legally valid RPZ test report.
Certification requirements:
Testing must be performed by a certified backflow prevention assembly tester holding credentials recognized by the local water authority. Certification processes typically include a written exam and a hands-on performance exam; renewal cycles vary by jurisdiction, commonly spanning one to three years. In some states, a licensed plumber may perform tests without a separate backflow certification, but many utilities still require the dedicated tester credential to accept filed results. Oregon, for instance, strongly encourages the certification even for licensed plumbers because many water systems require it to accept test reports.
In New Jersey, backflow certification requirements are enforced at the utility level, and testers must be able to demonstrate current credentials on request.
What drives the cost:
- Number of assemblies at the property (volume discounts are common for multi-unit or commercial sites)
- Device size and accessibility (a 4-inch assembly in a tight mechanical room takes longer than a ¾-inch residential unit)
- Travel distance and regional labor rates
- Whether repair or rebuild is needed in addition to the test
- Emergency or after-hours scheduling
Cost figures for backflow testing vary widely by region and job scope. Test-only fees for a single residential assembly tend to be modest; larger commercial assemblies or jobs requiring same-day repair cost substantially more. The cost variability across markets is significant enough that getting a local quote is always more reliable than any national average. Note that the linked source reflects Australian market data; U.S. pricing follows similar drivers but differs by locale.
Practical advice for property owners:
- Ask for the tester’s calibration certificate number and certification credential at booking, not after the job.
- Request an itemized invoice that separates the test fee, any parts, labor for repair, and the filing fee.
- Keep a copy of every test report on file at the property. A documented history of annual testing is meaningful evidence of due diligence if a contamination event ever prompts a legal question about the property’s maintenance record.
Key Takeaways
Compliant RPZ backflow testing requires a calibrated test kit, three documented differential pressure readings against hard thresholds, and a certified test report filed with the local water authority, typically on an annual basis.
| Point | Details |
|---|---|
| Three hard thresholds | Check #1 ≥5 PSID, relief valve opens at ≥2 PSID, Check #2 ≥1 PSID; fail any one and the assembly fails. |
| Annual filing is mandatory | Most U.S. jurisdictions require certified annual testing; utilities can disconnect service for noncompliance. |
| Calibration is non-negotiable | Gauge calibration must be current and traceable; an expired certificate can invalidate filed results. |
| Failed devices need immediate action | Isolate, notify the owner, repair or replace, re-test, and file the re-test report before restoring service. |
| Southjerseybackflow for NJ properties | Southjerseybackflow performs certified RPZ testing, repair, and direct filing with New Jersey water authorities. |
Why the test result is only half the job
The numbers on a test form tell you whether an assembly passed or failed at one moment in time. They don’t tell you why it’s trending toward failure, or what the property owner should do before the next annual test to avoid a more expensive problem.
That gap is where most testers leave value on the table. IAPMO BPI frames this directly: the tester’s role in client education is as important as the test itself. An owner who understands that a sluggish relief valve is a warning sign, not just a marginal reading, is far more likely to call for maintenance before the next annual cycle. That’s better for the water system, better for the property, and better for the tester’s reputation.
The practical version of this looks simple: when you note a marginal differential on the form, say something. Explain that debris on the seat is what caused it, that a strainer cleaning or a partial rebuild now costs a fraction of an emergency replacement later. Owners who receive that explanation tend to act on it. Those who just get a pass/fail sheet tend to forget about the device until the next compliance notice arrives.
There’s also a liability angle that property owners consistently underestimate. A documented history of annual testing, with records showing that marginal readings were flagged and addressed, is meaningful protection if a contamination event ever prompts a legal question. Utilities enforce testing requirements on the property owner, not the water purveyor. That responsibility doesn’t disappear because the test passed.
Southjerseybackflow operates across New Jersey with exactly this approach: certified testing, on-site repair and rebuild capability, and direct filing with local water authorities, so the property owner gets a complete compliance record, not just a number on a form.
Certified RPZ testing and filing for New Jersey properties
If you’ve received a compliance notice or your annual test is coming due, Southjerseybackflow handles the full process for residential, commercial, and multi-unit properties across New Jersey.

Services include certified RPZ testing, assembly repair and rebuild, emergency response, and direct submission of test reports to your local water authority. You don’t need to track down the filing portal or chase a separate plumber for repairs. One call covers the test, the paperwork, and any repair work the assembly needs.
Coverage spans Ocean County, Mercer County, Middlesex County, Gloucester County, and additional counties across New Jersey. Every completed job includes calibration certificate documentation and tester credentials on the invoice.
If you’ve already received a backflow compliance letter, the clock is running. Book a certified test now and let Southjerseybackflow file the results directly with your water authority. For the full picture on passing, submitting, and staying compliant in New Jersey, the NJ backflow compliance guide is a good starting point.
Useful sources and reference procedures
These are the primary documents and regulatory references that underpin the procedures in this guide.
-
NEWWA Laminated RPZ Test Procedure: The field-standard laminated card for 3- and 5-valve test kits. Use this as your on-site reference for step order, test cock hookups, and minimum differential values. It covers both the 3-valve and 5-valve kit sequences.
-
Backflow Parts Depot RP Testing Procedures: A detailed written walkthrough of the full RPZ test sequence, including gauge hookup diagrams and pass/fail criteria. Good for training new testers and for cross-referencing your field procedure.
-
EPA Cross-Connection Control Manual: The federal policy framework for cross-connection control programs. Use this for understanding utility enforcement authority, the public-health rationale for backflow prevention, and the regulatory basis for annual testing requirements.
-
IAPMO BPI Backflow Prevention Guidance: Covers the tester’s role in client education, proactive maintenance recommendations, and the business case for building testing into regular plumbing service. Particularly useful for testers who want to communicate the value of annual compliance to property owners.
-
New York State Backflow Tester Certification Instructions: A detailed example of state-level certification requirements, including initial training, exam standards, and renewal cycles. Useful for testers operating in the Northeast or seeking to understand how certification programs are structured.
-
California Cross-Connection Control Policy Handbook: One of the most detailed state-level regulatory frameworks in the U.S. Covers installation standards, field testing requirements, tester certification criteria, and enforcement procedures. Valuable as a benchmark for understanding best-practice regulatory requirements even outside California.
-
Oregon Health Authority Backflow Tester Certification: Outlines Oregon’s certification process, including the five-day approved course requirement, reciprocity provisions, and licensing requirements for fee-based testing work.
-
How to Use Backflow Test Kits (San Diego Field Guide): A practical field reference for hose hookup conventions, air-bleed procedures, and gauge calibration practices. The color-coding conventions (red/blue/green) and calibration advice apply broadly across U.S. jurisdictions.