
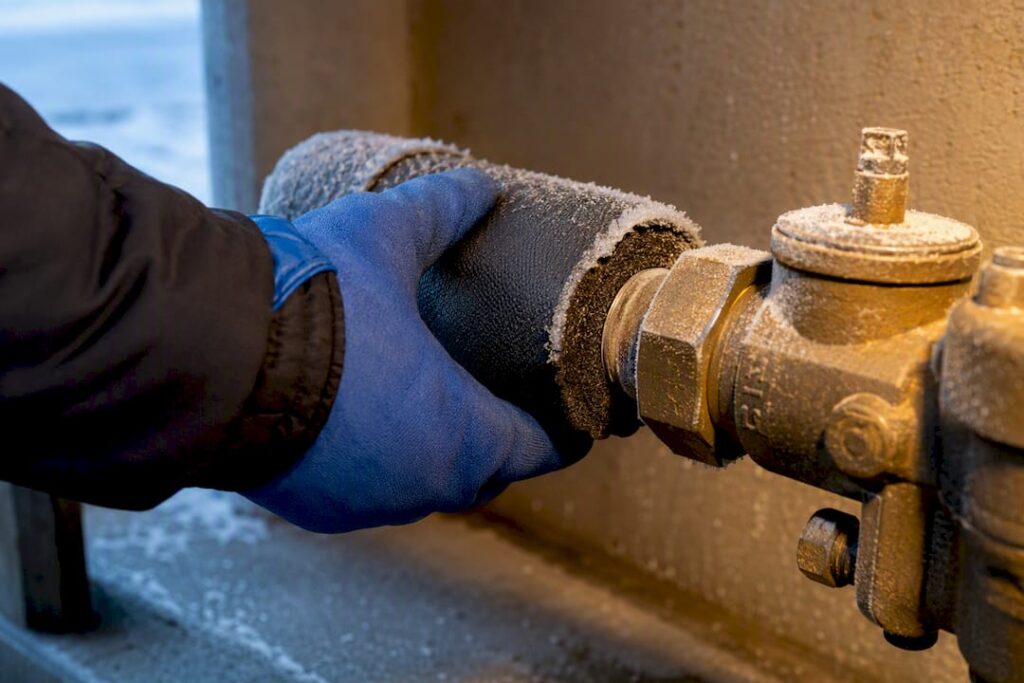
Yes, a backflow preventer can freeze, and it doesn’t take a polar vortex to do so. A single night at or below 32°F is enough to crack a bronze body, blow a relief valve, or seize the internal check assemblies. The fix comes down to two choices: isolate and drain the device completely, or insulate it well enough that trapped water never reaches freezing in the first place. If you already suspect freeze damage, thaw it slowly and get it tested before you trust it again.
TL;DR:
- Proper winterization involves shutting off the upstream supply, relieving pressure, removing hoses, and insulating or draining the device, depending on its type.
- RPZ assemblies are more vulnerable to freeze damage due to internal relief ports and chambers, requiring full drainage and ventilation measures.
- Draining and blowout procedures must be performed in sequence, including installing low-point drains and setting ball valves to 45 degrees to prevent water trapping.
- If a backflow preventer freezes, it must thaw gradually, be thoroughly inspected for damage, and tested by a certified technician before reuse.
- Insulation options like foam wraps, breathable covers, or heated enclosures combined with proper drainage provide effective long-term freeze protection.
Table of Contents
- Backflow Preventer Freezing: Immediate Actions Before the Cold Hits
- Does Your Backflow Assembly Type Change the Freeze Risk?
- Step-by-Step Winterization Procedure for Backflow Preventers
- Insulation and Enclosure Options That Actually Hold Up
- Draining and Blowout Details Most Guides Skip
- What to Do If Your Backflow Preventer Is Already Frozen
- Post-Freeze Testing and Seasonal Maintenance
- When Should You Winterize? Timing and Microclimates
- What Our Technicians See on Winter Service Calls
- Protect Your Property Before the Next Freeze Hits
- Sources
Backflow Preventer Freezing: Immediate Actions Before the Cold Hits
If a hard freeze is forecast for tonight, you don’t have time for a research project. Work through this list in order, starting with the water supply and ending with the parts that trap the most water.
- Shut off the upstream supply if you have safe, legal access to the isolation valve. Never force a stuck valve. Call a technician if it won’t turn.
- Open the test cocks and any bleed valves to relieve pressure and let trapped water escape.
- Remove any hoses connected to the assembly and open low-point drains so gravity does the rest of the work.
- Set the shutoff valves to roughly 45 degrees, not fully closed, so water inside the ball valve body can drain instead of pooling and freezing solid.
- Cover exposed valve bodies with an insulated freeze bag or a breathable insulated cover rated for outdoor use.
- Call a certified technician if you’re working with a reduced pressure zone (RPZ) assembly or anything more complex than a simple shutoff. Guessing wrong on an RPZ can trigger a cross-connection hazard, not just a busted pipe.
Pro Tip: Keep a laminated card zip-tied to the enclosure listing your valve’s winter position and shutoff location. When the temperature drops fast, nobody wants to be searching for a manual at 9 p.m.
This sequence lines up with the manufacturer winterization guidance from Watts, which specifically recommends draining and relieving pressure before any hard freeze arrives. If your property has multiple assemblies across different buildings, our backflow freeze protection guide walks through prioritizing which ones need attention first.
Does Your Backflow Assembly Type Change the Freeze Risk?
Not all backflow preventers freeze the same way, and the fix that works for one type can be the wrong move for another.
- RPZ assemblies have a relief port and multiple internal chambers, which means more surfaces for trapped water to freeze against. Never block or tape over the relief port. The safest combo is a full drain plus a ventilated, insulated enclosure that still lets the relief valve discharge if it needs to.
- PVB and AVB assemblies typically sit above ground on exposed piping, often right where wind chill hits hardest. Insulation plus open bleed valves usually does the job, since these assemblies have simpler internals than an RPZ.
- Double check valve assemblies (DCVA) are sometimes installed in underground vaults. If yours is below grade, draining alone may not be enough. The vault itself may need insulation or a low-wattage heat source to keep ambient temperature above freezing.
- Site exposure matters as much as assembly type. A device tucked against a south-facing wall behaves nothing like one standing in an open, wind-exposed yard. Elevation, shade, and proximity to a heated building wall all shift how fast a device chills.
Knowing which category your device falls into changes everything downstream, from which insulation product to buy to whether you can safely do the work yourself or need to bring in a licensed technician.
Step-by-Step Winterization Procedure for Backflow Preventers
Winterizing correctly is a sequence, not a single action. Skip a step and you can end up with water trapped exactly where it does the most damage.
- Locate and confirm your upstream shutoff and any low-point drains before you touch anything. If your setup drains indoors, make sure a bucket or floor drain is positioned to catch runoff.
- Shut off the water supply, then relieve downstream pressure by opening the test cocks starting from the lowest point and working up. This order matters. Opening the highest cock first can leave water stranded below it.
- Leave the ball valves at roughly 45 degrees rather than fully closed. A fully closed ball valve traps a pocket of water inside its bore, and that pocket is exactly what cracks the valve body when it freezes. Watts’ winterization bulletin calls this out specifically as the position that lets residual water escape rather than sit and freeze.
- Document the valve positions somewhere you’ll actually find them in spring. A phone photo works fine.
- Blow out lateral irrigation lines if your system feeds outdoor sprinklers. Keep the outlet drain open during the blowout and shield the backflow assembly itself from the compressed air pressure, since irrigation blowouts run at pressures the assembly wasn’t built to handle directly. A licensed irrigation contractor can walk you through safe blowout PSI for your specific pipe material if you’re not doing this every season.
- Insulate exposed piping once draining is complete, and cover the assembly itself with a product rated for the coldest temperatures your region sees.
- Label the winter configuration on the enclosure or nearby, so whoever reopens the system in spring isn’t guessing at valve positions.
Here’s a number worth sitting with: freezing water expands by roughly 9% inside a rigid pipe or valve body. That expansion has nowhere to go except outward, and bronze and cast iron don’t flex to accommodate it. That’s the entire mechanism behind every cracked backflow body you’ll ever see.
Skipping the blowout step on irrigation lines is one of the most common ways property managers accidentally destroy a backflow assembly they otherwise winterized correctly. Water sitting in a lateral line backs up into the assembly the first time it thaws and refreezes.
Insulation and Enclosure Options That Actually Hold Up
Insulation buys you protection without the hassle of a full drain and refill every time temperatures dip, but the wrong setup creates new problems instead of solving the old one.
- Closed-cell foam pipe wrap is the cheapest starting point and works fine for mild, short-duration cold snaps on exposed piping.
- Insulated freeze bags and outdoor-rated covers designed specifically for backflow assemblies are a step up. Look for ones described as breathable rather than fully sealed.
- Heated enclosures with UL-listed heat cable handle regions with sustained hard freezes, but they come with non-negotiable safety requirements: GFCI protection and thermostatic control every time. Heat cable run without a thermostat is a fire risk, not a convenience.
- Never wrap heat cable across or near an RPZ relief port. The relief mechanism needs to stay clear and functional, and wrapping it defeats the safety design the assembly relies on.
- Avoid airtight enclosures. A sealed box traps condensation, and that trapped moisture freezes just as reliably as standing water would.
Pro Tip: In a region with repeated hard freezes, insulation alone often isn’t enough on its own. Pairing a heated enclosure with a full drain-down gives you a backup if the power ever goes out during the coldest stretch of the season.
If you’re weighing a permanent solution rather than a seasonal scramble, our page on choosing a heated backflow enclosure breaks down sizing and installation specifics.
Draining and Blowout Details Most Guides Skip
Test cocks relieve pressure, but they don’t always fully drain the body of the valve. Water can sit in low spots inside the assembly even after every test cock is open.
- Install a low-point drain valve below the frost line where your plumbing layout allows it. This gives you a dedicated exit point instead of relying entirely on gravity through the test cocks.
- The 45 degree ball valve position isn’t optional if you want a clean drain. Fully open or fully closed both leave a pocket of trapped water inside the valve bore.
- Sequence a blowout from the backflow assembly outward, keeping the farthest zone valve open last so trapped air pushes water all the way through the system instead of stalling partway.
- Route indoor drainage to a floor drain or collection bucket before you start, especially on assemblies installed in a mechanical room or basement vault. Nobody wants a surprise puddle discovered days later.
What to Do If Your Backflow Preventer Is Already Frozen
If you’re past prevention and staring at a frozen assembly, moving fast the wrong way causes more damage than the freeze itself did.
- Turn off the upstream water supply first, before you attempt any thawing. This limits pressure buildup if a crack has already formed.
- Never use an open flame or a propane torch on a frozen assembly. The rapid, uneven heat can crack a body that survived the freeze itself intact.
- Apply gradual, indirect heat instead — a hair dryer set to low, warm (not boiling) towels wrapped around the body, or a space heater positioned a safe distance away and left to work slowly.
- Inspect thoroughly once thawed. Look for hairline cracks, bulges, weeping seals, or water pooling anywhere it shouldn’t be. Manually test the relief valve to confirm it’s discharging correctly.
- Schedule a certified performance test regardless of how it looks. Springs, seals, and internal check mechanisms can fail silently even when the exterior shows no visible damage.
A backflow assembly that survives a freeze visually intact can still have a compromised check valve or a relief mechanism that no longer seats correctly. That failure mode only shows up on a proper test, not a visual inspection from the driveway.
Post-Freeze Testing and Seasonal Maintenance
Any assembly that went through a suspected freeze deserves a certified performance test before you trust it again. Freeze thaw cycles can silently damage internal components that look completely normal from the outside, and that’s exactly the failure a certified test is designed to catch.
- Check insulation and covers for wear or gaps every fall before the first freeze.
- Verify ball valves are still sitting at the correct winter position after any service work.
- Inspect for leaks, weeping seals, or corrosion once the weather warms in spring.
- Keep dated service records and photos. They matter for warranty claims, insurance disputes, and municipal compliance filings alike.
Our backflow maintenance and preventive care guide covers the full seasonal checklist if you’re managing more than one property.
When Should You Winterize? Timing and Microclimates
Winterize before the first hard freeze, not after the forecast already scares you. A single night at or below 32°F is enough to start damage, and municipal cold-weather advisories consistently push property owners to act before extended subfreezing stretches, not during them.
- Local microclimates matter more than the regional forecast. Shaded, elevated, or wind-exposed sites freeze faster and harder than a sheltered spot a few hundred feet away.
- Recheck insulation after any major storm. Wind and heavy snow can shift or tear covers loose without you noticing until the next cold snap.
- Treat every freeze-thaw cycle, not just the season’s first hard freeze, as a reason to re-inspect.
What Our Technicians See on Winter Service Calls
Technicians often encounter the same handful of mistakes repeatedly at properties that thought they’d covered their bases. Non-breathable plastic covers trap condensation and freeze from the inside. Hoses left attached over winter hold water directly against the valve body. Heat tape gets installed without a thermostat, or worse, gets wrapped straight across a relief port.
Measure for insulated covers before the season starts, not the week of the first freeze. Document your winter valve positions somewhere you’ll actually check them in spring. And keep heat cable connections up off wet ground. Small details like these are the difference between a routine season and an emergency call in January.
— Jordan
Protect Your Property Before the Next Freeze Hits
Some companies handle the parts of winterization that carry the most risk if they’re done wrong, such as setting an RPZ assembly to its correct winter position or wiring a GFCI protected heat cable installation suitable for hard freezes. On-site winterization, insulated enclosure installation, heat cable setup, emergency thaw and repair calls, and certified performance testing with direct filing to local water authorities are available services in the industry.

A typical service visit covers a full inspection, the drain-down or protective installation your assembly actually needs, photo documentation for your records, and scheduling for your next required test. Property managers in certain counties can find services that include compliance filing directly with water authorities to ease management tasks. Get ahead of the season and schedule backflow testing and winterization before the next cold front rolls through.
Sources
- Watts — Winterization guidance for backflow assemblies (technical bulletin)
- Sprinkler Warehouse — Winterizing your backflow device to prevent freeze damage
- Panama City municipal advisory — Protect Your Backflows from Cold Weather This Winter
Pingback: 10 Minute Emergency Backflow Shutdown Playbook for Property Managers
Pingback: Contractors: 3–5 Day Plan for Temporary Water Backflow Requirements