
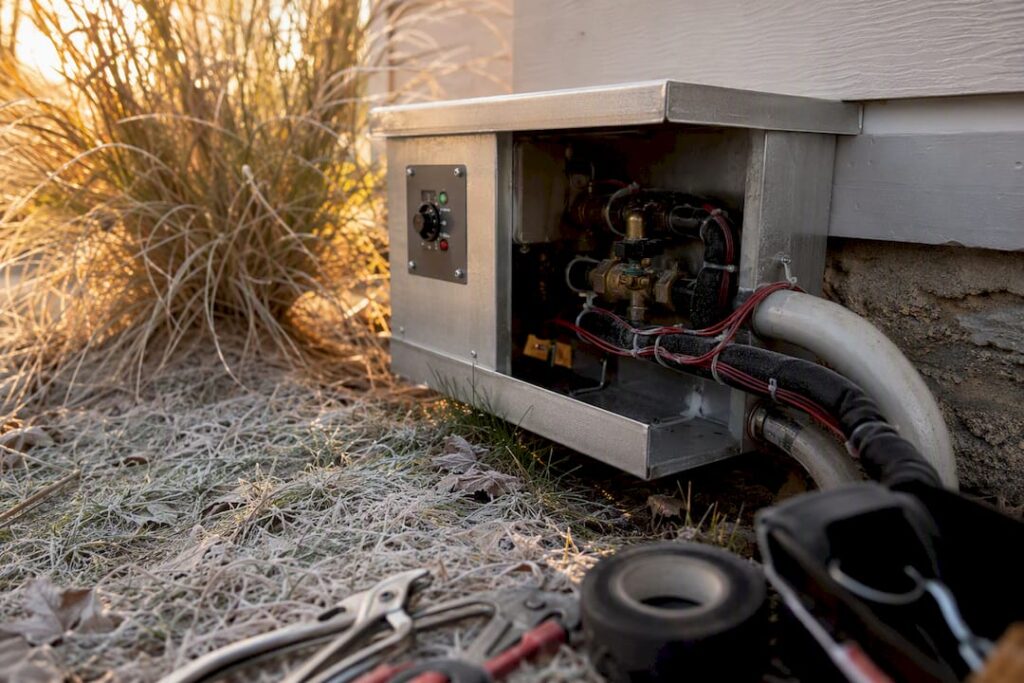
Choose an insulated enclosure that meets ASSE 1060 Class I and pair it with a thermostatically controlled, wet-rated heater. If your riser pipe runs below the slab, get the slab-mounted heater version. It warms the pipe run itself, not just the air around your backflow preventer.
- Sizing rule: measure the full assembly (device, shutoffs, test cocks, unions) and add roughly six inches of clearance on every side.
- Thermostat setpoint: around 40°F, mounted about 12 inches above the slab.
- Budget expectation: insulated-only units cost less than heated models, and slab-mounted heaters carry a real premium over wall-mounted or heat-cable options.
Key Takeaways
An ASSE 1060 Class I enclosure with a thermostatically controlled, wet-rated heater, ideally slab-mounted, is the most reliable way to prevent freeze damage to a backflow assembly.
| Point | Details |
|---|---|
| Standard to require | Insist on ASSE 1060 Class I certification for any enclosure marketed as freeze-protective. |
| Best heater for risers | Slab-mounted heaters warm up to 16 inches below the slab, protecting the pipe run itself. |
| Thermostat placement | Mount it about 12 inches above the slab, set near 40°F, away from direct heater airflow. |
| Size for the tester, not just the device | Measure the full assembly and add six inches of clearance for annual test access. |
| Where to get it installed | Southjerseybackflow handles sizing, ASSE-compliant selection, heater installation, and test filing across New Jersey. |
Table of Contents
- What Is a Heated Backflow Enclosure, and When Do You Need One?
- Which Standards and Safety Features Actually Matter?
- Slab-Mounted, Wall-Mounted, or Heat Cable: Which Heater Fits?
- How Do You Size an Enclosure So It’s Both Protective and Testable?
- What Installation Details Get Overlooked?
- What Should You Budget for a Heated Enclosure?
- How Do You Maintain a Heated Enclosure Year Round?
- What Property Owners Get Wrong About Freeze Protection
- How South Jersey Backflow Handles Enclosure Installation
- Sources
What Is a Heated Backflow Enclosure, and When Do You Need One?
A heated backflow enclosure is an insulated housing built around a backflow preventer with an active heat source inside, usually a thermostatically controlled electric heater. A passive enclosure or a plain steel cage keeps out weather and vandalism but does nothing once the temperature drops. Manufacturers position insulated and heated enclosures as separate product tiers for exactly this reason.
You need active heat when:
- Your property sees sustained stretches below freezing, not just an occasional overnight dip.
- The backflow assembly sits above grade, exposed to wind, with a riser pipe running through unheated space.
- Freeze events below 32°F happen more than once or twice a winter.
Pipe insulation, sealing drafts around the enclosure base, and heat cable on adjacent runs all help, but they supplement a heater rather than replace one where hard freezes are routine.
Which Standards and Safety Features Actually Matter?
ASSE 1060 Class I is the benchmark for freeze-protection enclosures. It tests whether an enclosure and its heat source keep a backflow assembly functional at sustained low temperatures, not just insulated from wind. Skip a product that can’t point to this rating.
Beyond the standard, insist on:
- A heater and thermostat rated for wet or damp locations, since condensation inside an enclosure is routine, not rare.
- Insulation with a stated R-value, so you can compare products instead of guessing at thickness.
- A drain flap at the base to shed condensation and stray water.
- Lockable access panels, both to deter tampering and to keep the enclosure sealed between test visits.
Slab-Mounted, Wall-Mounted, or Heat Cable: Which Heater Fits?
Three heating approaches dominate the market, and they are not interchangeable.
- Slab-mounted heaters. These sit at the base of the enclosure and warm both the interior air and up to 16 inches beneath the slab, which is exactly where riser pipes fail first. If your assembly has any exposed riser below grade, this is the option worth paying more for.
- Wall-mounted heaters. Easier to retrofit into an existing enclosure, but heat rises, so they warm the upper cavity better than the pipe penetration point at the bottom. Fine for compact, above-grade setups with no riser exposure.
- Heat cable or self-regulating cable. Effective wrapped around small-diameter branch lines, but it can’t deliver even heat across a large riser or a full assembly cavity the way a dedicated heater does.
Pro Tip: Mount the thermostat about 12 inches above the slab, not at the top of the enclosure. Heat stratifies, and a thermostat placed too high will read warm while the pipe near the ground is still at risk.
Whichever heater you choose, confirm it carries a wet or damp rating and pair it with a remote alarm if the enclosure serves a property you don’t check daily.
How Do You Size an Enclosure So It’s Both Protective and Testable?
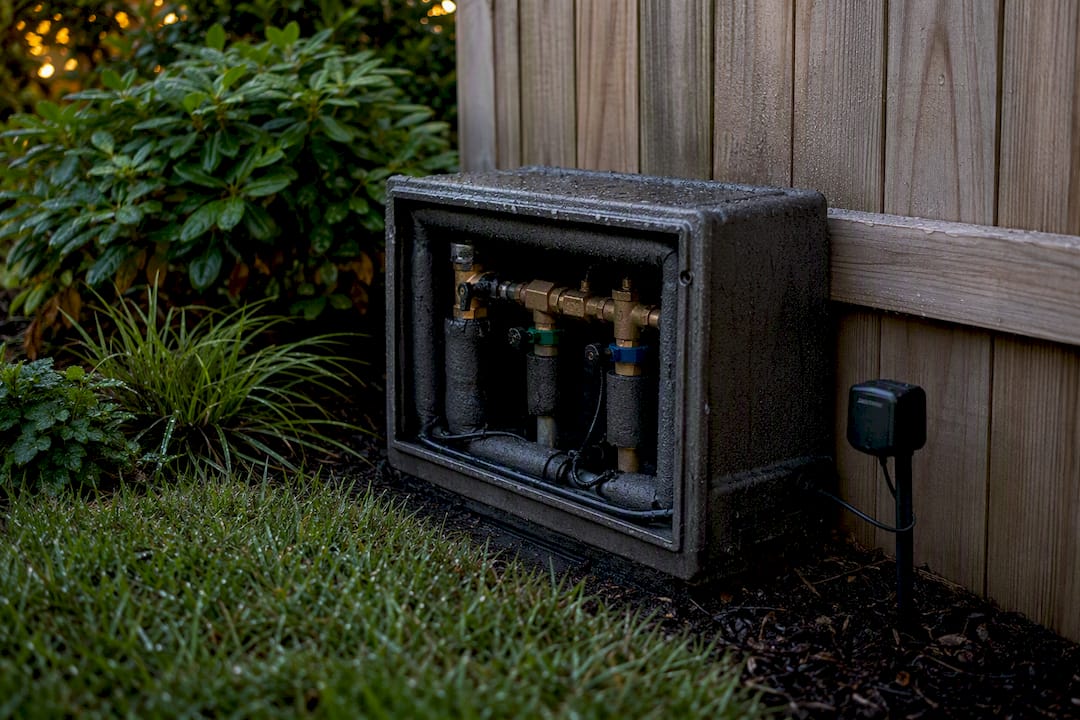
Measure the entire assembly first, not just the backflow device. That means the shutoff valves on each end, both test cocks, unions, and any strainer, laid out at their full extended length.
- Add a minimum of six inches of clearance on every side so a tester can turn wrenches, attach gauges, and read test cocks without disassembling anything.
- Choose door or panel configurations that open fully onto the test cock side, not just a small access hatch.
- Account for riser length and slab penetration depth when you’re specifying a slab-mounted heater footprint.
- Leave room for an electrician to run conduit and mount a junction box without cramming it against the device.
Undersizing is the single most common enclosure mistake property managers make, and it’s the one that turns a routine annual test into a two-visit headache.
What Installation Details Get Overlooked?
Power supply comes first. Most residential and light commercial enclosures run on 120V, but larger slab-mounted heaters on commercial risers sometimes need 240V, so confirm this before your electrician shows up. If the property loses power during a cold snap, a remote alarm that texts or calls when temperature or power fails is worth far more than a bigger heater.
- Route condensation through the drain flap at the base rather than letting it pool near electrical connections.
- Keep the thermostat around 12 inches above the slab, away from direct heater airflow, so it reads actual ambient conditions.
- Use only heaters and components rated for wet or damp environments; an uncertified space heater or a DIY heat lamp inside a sealed enclosure is a fire and electrocution risk, not a shortcut.
- Have a licensed electrician handle all wiring. This isn’t a place to save money on labor.
Pro Tip: If your enclosure sits somewhere prone to drafts near the base, seal that gap before winter. A well-insulated pipe run and a sealed foundation, as recommended for general winter pipe protection, reduce how hard your heater has to work.
What Should You Budget for a Heated Enclosure?
Insulated-only enclosures sit at the low end of the price range. Add a heater, and the price climbs. Add a slab-mounted heater specifically, since it requires more material and a more involved install, and you’re paying a further premium over a basic wall-mounted unit.
What actually drives the number on your quote:
- Custom or oversized dimensions to fit a large commercial assembly.
- Higher insulation R-values for properties in harsher climates.
- Slab-mounted heaters versus wall-mounted or cable systems.
- Remote alarms and monitoring add-ons.
- Shipping weight and professional installation labor.
Manufacturer pricing patterns show heated models consistently priced above insulated-only versions of the same size, which reflects the heater, thermostat, and wiring, not just a markup. Weigh that against the cost of a single freeze-cracked assembly: replacement, emergency repair, and the property being without water while it’s fixed usually dwarfs the price difference of buying the right enclosure the first time.
How Do You Maintain a Heated Enclosure Year Round?
An enclosure with a heater isn’t a install-it-and-forget-it fixture. Build a short annual routine around it:
- Test the thermostat setpoint and confirm the heater actually cycles on near 40°F.
- Check that any alarm or remote monitoring system is transmitting correctly.
- Clear the drain flap and any vents of debris, leaves, or ice buildup.
- Inspect door seals and insulation panels for gaps, cracks, or water intrusion.
- Confirm access panels still open fully for your annual backflow test.
If the power fails or a heater alarm triggers during a cold snap, don’t wait until the next business day. A few hours without heat in a hard freeze is often enough to damage a riser, so treat that alarm as an emergency service call, not a maintenance note.
What Property Owners Get Wrong About Freeze Protection
Most guidance on this topic treats the enclosure as the whole solution and the heater as an accessory. That’s backward. The enclosure is the box; the heater and its thermostat are what actually keep the device functional at 10°F. A property owner who buys an insulated cage without heat, in a region with real winters, has bought weather protection and vandalism deterrence, nothing more.
The bigger blind spot is access. Owners fixate on freeze protection and forget that every enclosure still has to open fully, every year, for a certified test. An enclosure sized too tight around the device turns a 20-minute test into a service call to remove panels, which costs more in labor than the extra six inches of clearance would have cost in materials.
If you take one thing from this: prioritize the slab-mounted heater when your riser runs below grade, size for the tester before you size for the device, and treat the thermostat placement as seriously as the heater brand. Most freeze failures trace back to one of those three decisions, not to a cheap enclosure shell.
— Jordan
How South Jersey Backflow Handles Enclosure Installation
Southjerseybackflow is the practical alternative to guessing at enclosure specs off a catalog page or hiring a general contractor unfamiliar with backflow compliance. We measure your assembly on site, spec an ASSE 1060 Class I enclosure sized for your device and your tester’s access needs, and install slab-mounted heaters with correctly placed thermostats and alarms when your riser calls for it.
The process runs in four steps: a quote based on your assembly type and site conditions, a site visit to confirm measurements and heater placement, installation with a licensed electrician on the wiring, and a final test with your report filed directly with your water authority. We serve properties across Ocean County, Middlesex County, and surrounding New Jersey communities, with consolidated billing available if you manage several properties. If you’re staring down a freeze season with an unprotected or undersized enclosure, request a site visit and get a real quote before the first hard freeze hits.